 |
| Knife rack built into unused gap between cabinets and wall |
|
We needed a good solution for storing knives. Drawer knife holders are not far enough out of reach for young kids. A counter top knife block would hog precious space. Wall magnets keep blades out of the way -- but in our small kitchen, "out of the way" could easily be bumped. For lack of a better option, we installed magnetic strips along our wall, but for years I envisioned a cascade of knives whenever a door was slammed.
 |
| Wall magnets where our knives used to hang, in front of unused gap |
Between one of our sets of upper cabinets and the wall there was a gap. It looked awkward and I've long wondered what I could do with that space. Add a ledge at the bottom so we can store cutting boards or baking sheets? Buy a slide-out spice rack? I checked online but there were no easy solutions that would improve our lives. I kept going back to the awkward knife situation. There are a few images of pull-out knife blocks but the blades slide in from above. We are tall but not THAT tall. So I started sketching something I might be able to assemble myself.
 |
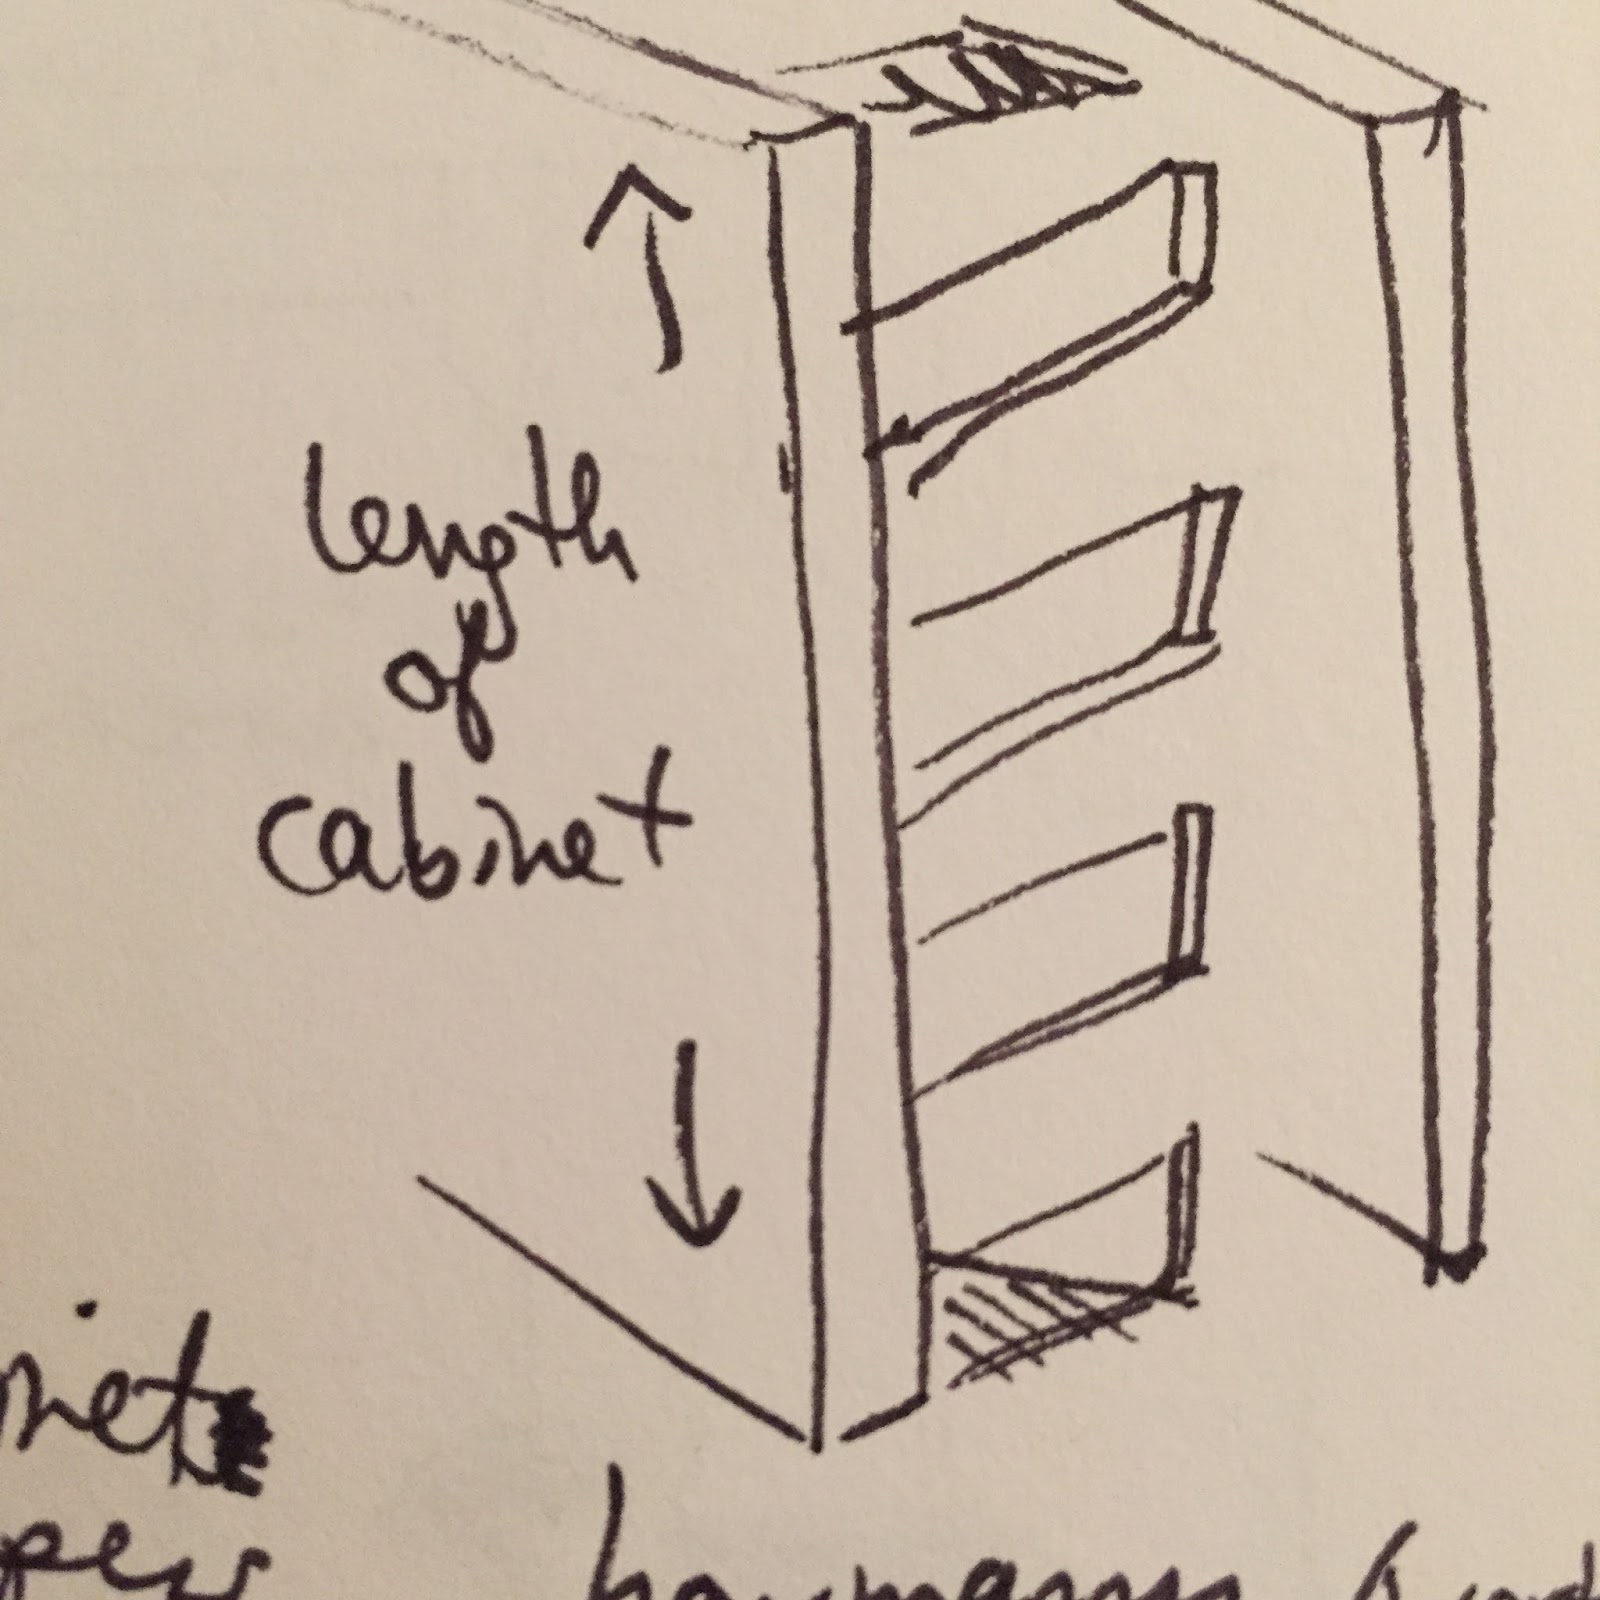
| Early sketch of idea for knife block that used wasted space |
I didn't know what supplies I should use, how they would fit, or how to best secure this in place. I sketched some more, looked online some more, then thought about sandwiching a thin magnetic sheet between the layers of wood, to hold the knives put. I found what I needed on Amazon and placed an order. Momentum started to build.
 |
| Ideas continue to percolate |
I looked around in the garage and found some scraps of wood, saving me a trip. Among the odds and ends was a long thin strip of lathe, and two boards that were pretty close to the height of my cabinet. I held them up and had an idea -- what if the rack went to the ceiling? The extra room would come in handy, and it might look more finished. I could trim off the top so it resembled the other cabinets I extended to the ceiling last year.
 |
| Simple box to hold odds and ends at the bottom of the rack |
The wood wasn't long enough to extend from the ceiling to the bottom of the cabinet. What if I added a magnetized catch-all cubby at the bottom, for sharp stuff like the pizza cutter and cooking shears? I measured and cut some additional pieces that create a box below the knife holder.
 |
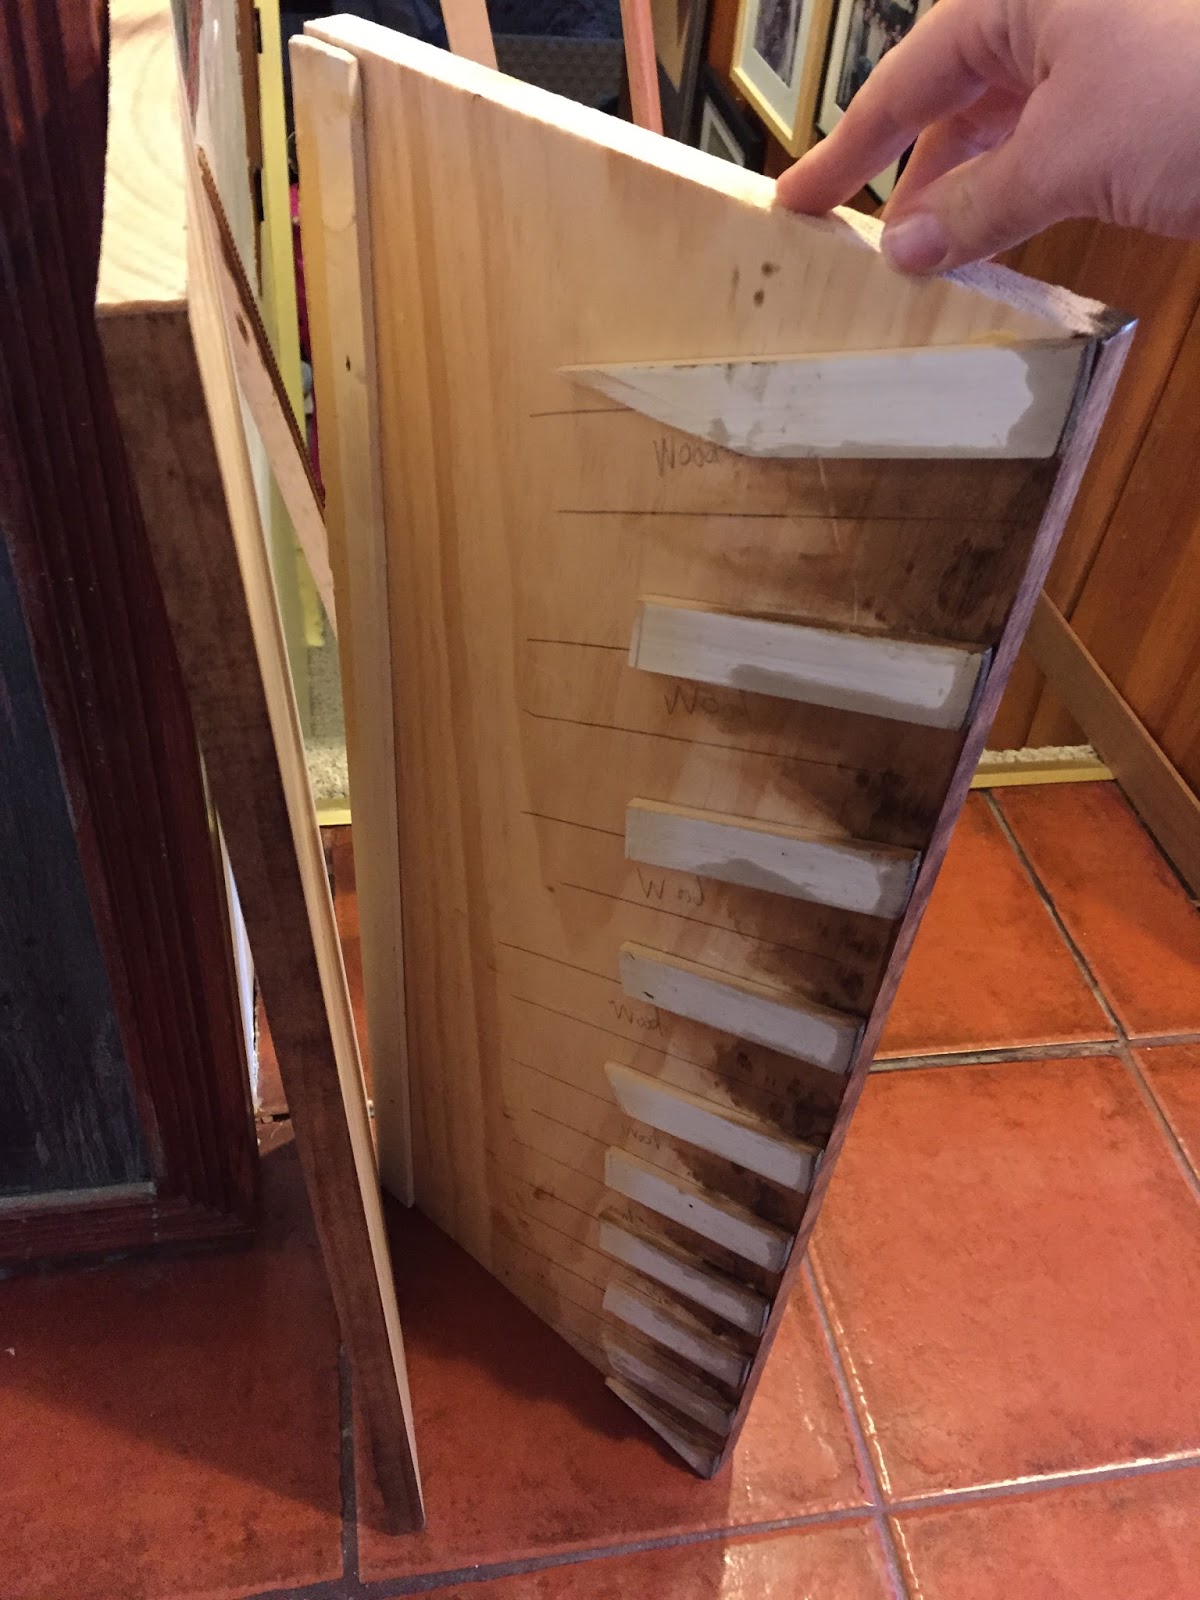
| Existing knives served as a template for the openings |
Next I laid each of our existing knives on one of the boards and roughly traced where they might go, using the strip of lathe as a placeholder between them. The shorter blades made sense at the bottom, where there wasn't a lot of room, and the longer knifes had enough room higher up.
 |
| Ready to fit together |
I used wood glue to affix strips of lathe to the inside of the wood sandwich. These strips weren't pretty; I cut them roughly into the lengths I needed, only worrying about the angle of the edge that faced outwards. Next I stained the portions of this assembly that would be visible. I also sanded the sides of the wood that would touch the knives, so nothing funky would make its way into our food.
 |
| Whatever it takes to keep the pieces pressed firmly together while the glue dries |
The strip of magnet that I purchased had adhesive on one side, and I assumed it would be strong enough to grab the knives as they slid into the holder. Turns out it's not particularly robust, and to make matters worse, the adhesive on the back is weak. That's fine for the knife slots because they are so narrow, it's not going anywhere, and the slots are slanted so the knives aren't going anywhere either. But in the wider opening of the cubby underneath, it's a bust. That area will probably need more powerful magnets in the future.
 |
| Not as sticky as it needed to be |
When it was time to hang up my creation, I started by sliding the cubby into the gap. It was a tight fit, and I needed to tap it into place with a hammer. This was a blessing because I now had a resting place for the bigger knife holder.
 |
| Cubby finished with some quarter-round trim (idea was that this would be magnetized) |
There was room on either side of the knife rack so I tapped some shims (thin slivers of wood) in with a hammer until it was snug. Next I hid the shims and gaps with a strip of trim leftover from another project.
 |
| Assembly and staining in progress |
The top of the knife rack didn't quite reach the ceiling, so I wedged a block of wood up there and gathered up some leftover molding. My miter saw and box came in handy yet again as I cut the scraps to size. Rather than hammer them on, I took a shortcut and glued the pieces then used painter's tape to keep them in place while they dried. This was not an area that was going to be bumped often so I didn't want to invest a lot of time or risk shifting the shims etc. with an errant blow of the hammer. I slopped on some stain and called it a night.
 |
| Messy stain but it does the trick, and the ceiling etc. are due to be repainted |
I started to affix more tiles onto the wall in front of the knife rack, which I'd been slowly covering over the past year as dishes broke or I got another box of tile. I knew I couldn't complete the mosaic wall right away but wanted to get a sense for how the wall might look when it was finally complete.
 |
| Knife rack with cubby underneath, and tiles in the process of being adhered to the wall |
We've been using the knife rack for two months and it's doing the trick. I'm relieved we don't have a hazardous wall of knives, and it feels good to do something with an otherwise wasted space. I can't wait until our kitchen is painted and the tile wall is complete.


No comments:
Post a Comment